Wednesday, September 25, 2019

Second Monument


For this project, I wanted to practice making tapered / trapezoidal shapes and rounded / chamfered edges. As a reference photo, I chose the monument to the 2nd MD Infantry, located on the Gettysburg National Park. I chose this one because it's pretty simple and had the features I was looking for.
https://en.wikipedia.org/wiki/List_of_monuments_of_the_Gettysburg_Battlefield#/media/File:2nd_Maryland_Infantry,_CSA_monument_-_Gettysburg.jpg

It seems there are several ways to shape blue foam into tapered shapes, but here is the one I went with. I cut out cardboard templates like the one shown below and  taped them with double-sided tape on both sides of the piece. These are used as "stops."
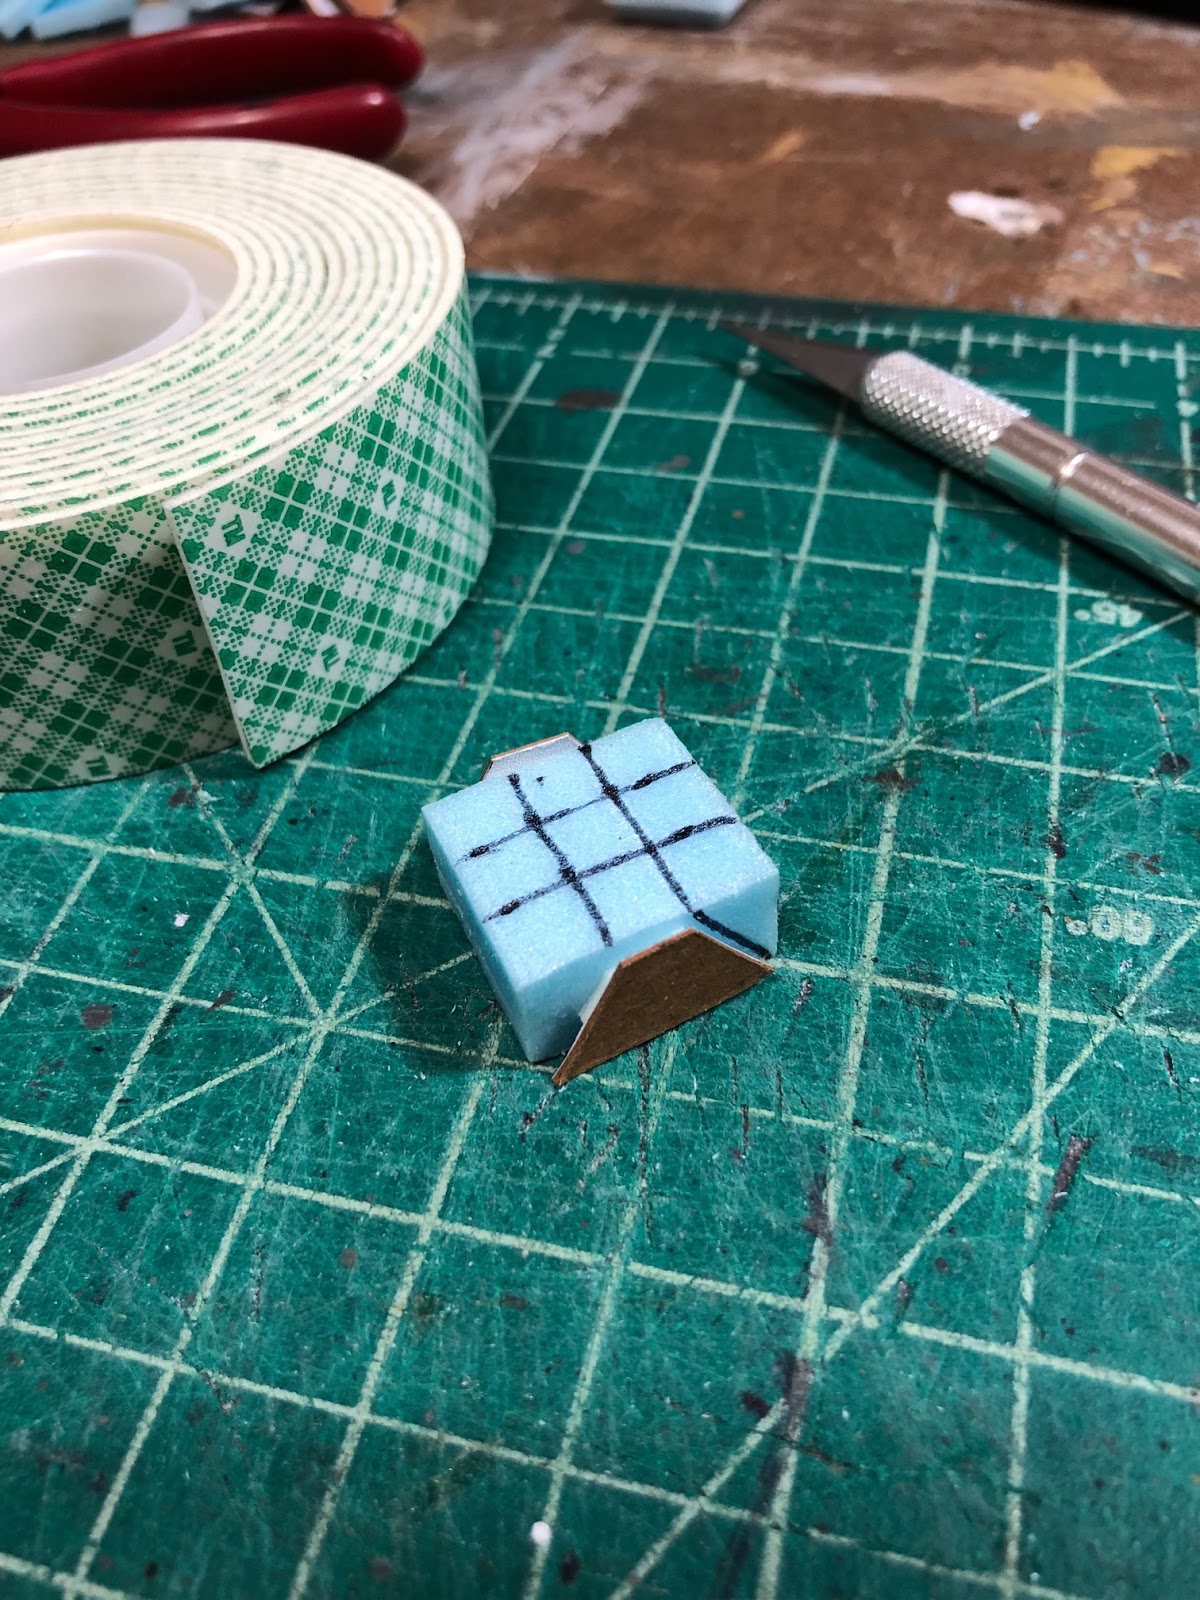

Then I used a utility knife with the blade extended out and cut most of the way to the cardboard stops.

Then I sanded on very fine grit sandpaper carefully until the foam was even with the cardboard stops.

Do do the other sides, I skipped the stops and just marked where to cut / sand.

To get the chamfered edges on the base pieces, I kept the sanding block parallel to the table as I sanded it back and forth, which keeps it even. I also masked off the top edge with a thin piece of tape. 

 I used PVA glue to join the pieces and clamped it all down. At this time I prepped some random ornaments I had that might look OK on the front and top of the monument. For the top, I used a push-pin that had a huge round plastic head on it. This would represent the sphere that had been on the top of the reference photo.


I painted the top ornament a brown / brass color and glued the pin into the foam with PVA. The image below is near final. I debated whether to put anything on the front, and ended up adding a small skull shape as shown on the photo at the top of the post. In terms of the dimensions, it didn't come out exactly like the 2nd MD Infantry's monument, but close enough!


D.I.Y. Photo Backdrop!

Usually for these blog posts, I just take pics with my smartphone. But sometimes I use my SLR camera on the tripod, so I can adjust the settings. For this model, I made a backdrop for the photo, almost like the background to a diorama. I doesn't matter if it turns out like a hack job, because the details on the painting can be blurred with soft depth of field. Below is the painting I made for it (kind of a cold, dark, misty forest), with the monument model sitting in front of it. Clearly I went overboard with the size of the background, but that's OK because I'll likely use this again for something else. The result is the pic shown at the top of this blog post. For the pic I used, the painting was about five feet in back of the model. If I had moved the backdrop even further away from the model, I could have shown more of the painting. Or I could have used a wide-angle view -- more things for me to try for next time. 


Tuesday, September 17, 2019

A Monumental Achievement

My wife grew up in Gettysburg, PA. The national park there has hundreds of impressive monuments to the Civil War battle, and I've been inspired to try to make a miniature replica of one of them. Most of them are way beyond my current ability, so I settled for starting out with a simple "plinth," which is what they call the heavy base for a statue or memorial. I will probably eventually mount something onto the top of this base, like a miniature figurine. Here is a link to a list of the monuments: https://en.wikipedia.org/wiki/List_of_monuments_of_the_Gettysburg_Battlefield.


Normally for materials, I like to use the Palight ProjectPVC board, but this time to get the scale I wanted, I would need to use material only 1/16th of an inch thick, and I don't have any Palight that thin. Cardboard is available that thin, and I considered that, but then decided to use wood.

One of my goals for this is to figure out how to make details like various kinds of moldings and shaped edges. With edges only 1/16th of an inch thick, my plan was to sand the edges into a "chamfer" or bevel shape. That's one of the reasons I went with wood rather than posterboard. I just ran the edges of the wood panels, at an angle, along 320 grit sandpaper.


For the thicker sections, I used blue foam, so I used white PVA glue to join the foam to the wood sections. I found it a little tricky lining everything up so the various panels were square with each other.

Once assembled, I sealed the foam and wood with a mix of paint and PVA glue. I hoped that would conceal some of the grain of the wood, and it did help a little.

So this was a good start -- maybe next time I'll tackle a more complicated monument!


Friday, August 16, 2019

Stone Dice Tower with Arches

Just finished this dice tower! Trying to be more deliberate in the planning of models like these, and this time I spent a few minutes online reading about early medieval European architecture, the Romanesque style. Lots of round arches, symmetry and light stone work. There's only so much you can include in a little structure five inches high, but I got the arches into the design on front and back, and added some molding on the edges. For the cobblestone pattern, I used the Green Stuff World Textured Rollers on Sculpey. More pics about how it was made to come.


How I Made It

Started by making the frame / dice chute out of Palight PVC (as usual; see my other blog posts), and joining with Superglue.


Picture below shows the ramp at the bottom. I carved the texture with a gouge. The Ramp is propped up with blue foam. The picture also shows the guide marks I used for the "bumpers" inside the dice chute. 


For the brick texture on the outside walls of the chute: 
I peeled the paper off both sides of foam board, attached the foam to the walls with PVA glue, scored the grooves with a hobby knife, then used a ballpoint pen over the scores to widen them. 


In medieval architecture, the door and window jams often have receding planes (as Wikipedia describes it). The pic below shows how I tried to incorporate that into this design.

I made window sills out of Palight PVC board.


Here are the Vallejo paints used. Stone grey was mixed in with most colors and used as the base of the bricks. 


For the base, I used the paints shown below and made a slight texture by stippling it. 


I red/rust color on top, sills and bottom railing were sponged on to give it a texture. And I added some of that glitter paint, which I think helps make the flat surface of the top more interesting.

I finished it with a spray of Testor's Dullcote varnish, except for the top and cobblestone area, which I gave a gloss varnish. 


Saturday, June 29, 2019

Fishing Shack, Part 2


Just as in Part 1 of the Fishing Shack, I used the paper model by Fat Dragon Games as a template for the other sides. In this pic, the front of the house that I made in Part 1 is in upper left. For the other three pieces, the paper templates are spray-mounted onto the PVC board.

This time I decided not to cut holes where the windows and door are. Instead, I left those areas flat and made sure NOT to cut grooves in those spots to represent siding.


I used a tool called The Chopper I to cut the small styrene strips. This helps keep the cut at 90 degrees.


Superglued the strips around the windows and door.


I had kept the windows that had been cut out of the front of the house, which I'm holding in this picture. I used that as a reference for painting a rough reflection on the windows. 


At this point, all I needed to do was the roof.


After a little online research it seemed like a good way to make shingles for a roof is by using thick paper or cardboard. I happened to have a lot of nice thick watercolor paper, so I used that because it will take paint well. I used the paper model again as a guide for size of the rows of shingles, and drew them out onto the paper. 


Using a combination of inks and Vallejo acrylic paints, I stained the paper before I cut out the strips.


The picture below shows the paper model reference, and some of the strips after they had been cut out.


Sometimes I used a card to mask off some shingles while stippling other shingles, to add variety.


Here are the shingles after I glued them onto the roof. I used PVA glue, and then once all of them were on, I went over the top of them again with one layer of the same glue, to keep the paper down.


This picture shows another detail I added -- a step just outside the doors. I made that with PVC board, textured with a rock, and then painted.

This project was fun. I decided to call it a day at this point, although there are other finishing touches I could do at some point: a chimney in the center of the roof, some static grass along the edges, perhaps other fishing-theme items like nets or buoys. But for now I'll leave those options open, because they may change depending on whether I use this in some sort of diorama.


Monday, June 24, 2019

Fishing Shack, Part 1

So far, I only have the front of this building done but it will be a fishing shack suitable for use with 28mm miniatures.


As a template for this building, I used a paper model spray-mounted onto the Palight PVC board. The paper model is Dock Building A in the Ravenfell set of EZ Dungeons by Fat Dragon Games.


Using the template, I cut out the windows and door. When it came time to remove the paper model, I found that it helped to heat it first with a hair dryer. It loosens the glue and makes it easier to peel the paper off. Then I cleaned more of the glue residue off with rubbing alcohol.


Colors shown were mixed for the base coat. I mixed in a light gray for coats over this.

Before painting, I carved grooves for the clapboard siding, using a hobby knife. For the wood grain texture, I scraped the clapboards with rough sandpaper.


I used styrene strips for window casings and door frame, glued on with superglue gel. 


Stippled green colors on along the bottom and other random places to represent algae or moss growing there.


I also gave this a wash, mixing the items shown with some water. 


Tuesday, June 18, 2019

Textured Rolling Pins from Green Stuff World

I picked up two textured rolling pins from Green Stuff World and tried them out for this post.

The top two pieces in this image were made using the Small Cobblestone roller, and the bottom piece was with the Small Dutch Bricks roller. The material used was Original Sculpey, and I painted them with Vallejo colors.


I also tried pressing the texture onto blue foam. Not as good as Sculpey, but might not be bad if I took my time with the paint job.


I set up this display to see how the bricks would look as a vertical wall. To see how I made the floor, check out my post called Wood Floor Part 2.